Understanding Your Four Survival Stats
The moment you land on Sota7, four icons appear in the bottom-left corner of the screen. These are your survival stats — each one is a timer counting against you if ignored.
Health
Health (wave icon) depletes when you take damage from hostile fauna, environmental hazards, or extreme temperatures. It does not regenerate automatically — you need food, medical supplies, or shelter to recover. In the Amber Plains starting area, most fauna is docile, so Health damage during your first hour usually comes from falling or approaching aggressive territorial species.
Hunger
Hunger (stomach icon) drains over time as you move and interact. The safest early food source on Sota7 is plant-based: several Amber Plains flora yield edible fruits that can be harvested with secateurs. Build a Greenhouse module as early as possible to create a sustainable food loop.
Thirst
Thirst (water drop icon) drains faster than Hunger during active exploration. Fresh water is abundant near Sota7's river biomes and shallow tide pools. Later in the game you can distill and store water in your base. In the opening hour, stick close to the river crossing you can see from the starting Amber Plains area.
Research Progress
Research Progress (eye/scan icon) is different from the others — it doesn't kill you if it's low, but it gates progression. Scanning new species and specimens fills this meter and unlocks new recipes, crossbreeding options, and EON Corp mission objectives.
First 10 minutes: Thirst → Hunger → shelter placement. Thirst drains fastest and is most fatal if ignored. Find the river before doing anything else.
Your Starting Equipment
Hennessy arrives on Sota7 with three essential tools visible in the hotbar at the bottom-right of the screen:
Bio-Scanner
Your primary research tool. Point it at any plant, creature, or mineral deposit and hold the scan button. A game-native "Scanning..." tooltip appears with a teal progress bar and an amber loading indicator — wait for it to complete. Successfully scanning a species adds it to your Field Journal, unlocks its trait profile, and contributes to Research Progress. The scanner also reveals interaction hints on interactive objects.
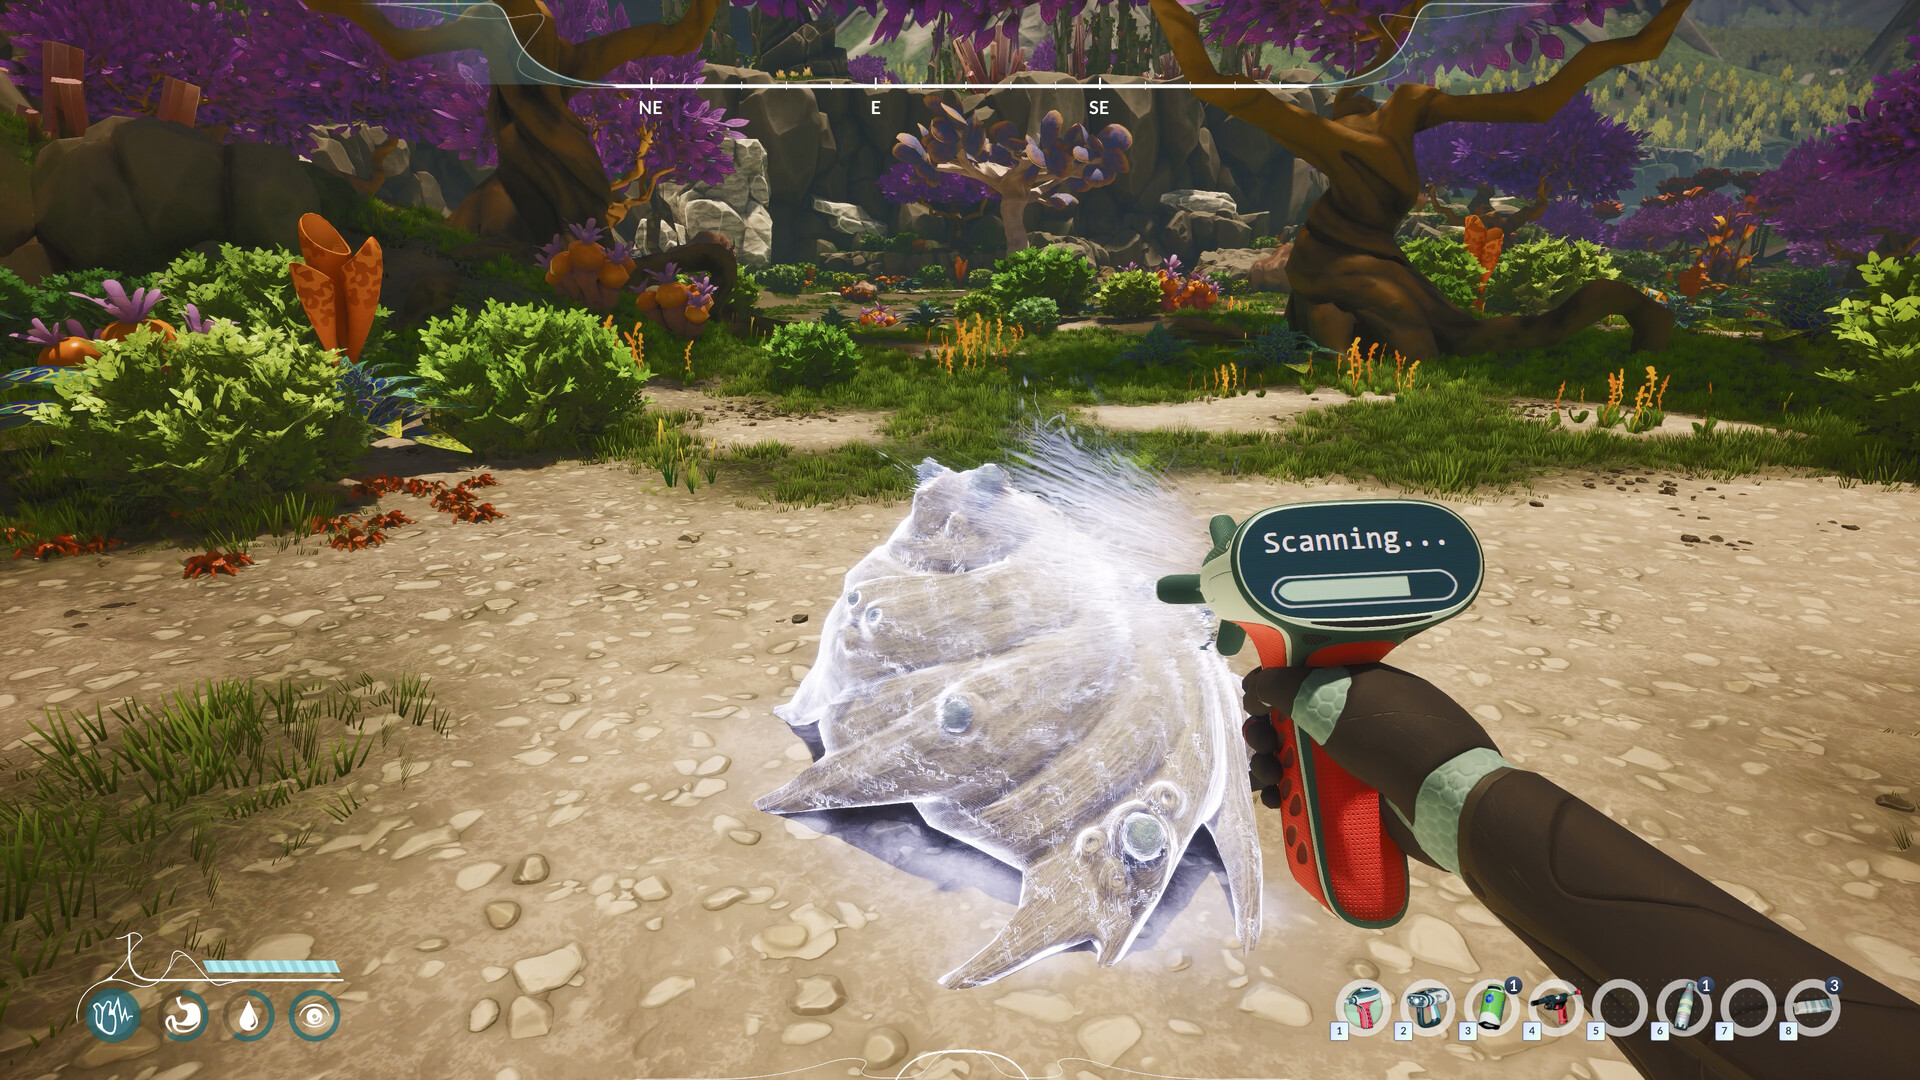
Secateurs
Used to cut and collect plant specimens — leaves, stems, seeds, and fruits. Essential for gathering food, crossbreeding samples, and crafting basic tools. Some plants will fight back if you try to harvest them before scanning — the scanner gives you a threat assessment first.
Chisel
Extracts mineral specimens from rock formations. Required for early-game crafting recipes including shelter foundations and lab benches. In the Amber Plains, rock formations cluster near the stone arch formation visible in the distance from spawn.
Do not approach the underwater biome with any tool in the first hour. The Abyssal Predator (screenshot_7) is extremely aggressive and will one-shot you without defensive gear. Scan it from the shoreline.
First Hour Step-by-Step Walkthrough
Step 1: Find the River (Minutes 0–5)
From spawn in the Amber Plains, head toward the compass bearing that shows the most green vegetation — this is the river crossing biome. Refill your Thirst by interacting with a freshwater pool or stream. While you're here, scan 2–3 aquatic plant specimens you find near the bank (avoid the water itself).
Step 2: Scan Your First Creatures (Minutes 5–15)
Return to the Amber Plains open area. You'll see herd fauna (large, dog-like creatures) gathered near the watering hole. These are docile — they tolerate close approach. Scan the full herd; each unique specimen type adds separate Research Progress. You can even interact with (pet) some individuals. Also scan the orange-stalked plants and the low scrubs — both yield early food and crafting materials.
Step 3: Harvest Basic Materials (Minutes 15–25)
Use your secateurs to harvest edible fruit from the low-hanging plants near the herd. Use your chisel on the stone arch formation at the biome border to gather mineral fragments. Collect at least: 8× plant fiber, 4× edible fruit, 6× stone chip. This is enough to build the starter shelter and a basic storage unit.
Step 4: Place Your Base (Minutes 25–40)
Open the planning mode (Tab by default). Place the Starter Shelter where the terrain is flat and away from the known paths of aggressive orange crab-like fauna (screenshot_4 zone). Place your storage unit adjacent. The base in the screenshot_1 night scene shows a good placement: slightly elevated, with a clear view of incoming fauna from the north.
Step 5: Build the Greenhouse (Minutes 40–55)
Once your shelter is up, unlock and build the Greenhouse module. Plant at least 2 edible crops you've already scanned. This closes your food loop and lets you focus on research rather than survival scavenging in subsequent sessions.
Step 6: Place the Laboratory Module (Minute 55–60)
The Laboratory is the gateway to the core bioengineering gameplay. Build it adjacent to your shelter. You won't have enough samples to run your first crossbreeding experiment yet, but placing the lab unlocks the Crossbreeding menu and shows you what specimens you still need to collect — a natural guide for your next exploration session.
This walkthrough is based on the August 31 Steam demo build. The full September 8 release may add or adjust specific step timings and resource quantities. Mark any discrepancies in the Honeycomb Steam Community hub and we'll update this guide.
Key Survival Rules for Sota7
- Scan before you harvest — the scanner tells you if a plant is toxic or a creature is territorial before you make an expensive mistake.
- Running is always valid — the game explicitly acknowledges this: "when running is the smartest experiment you can perform" (official Steam description).
- Document everything in your Field Journal — understanding species traits is what drives your crossbreeding strategy, not just your survival.
- Build temporary outposts at biome borders — when exploring a new biome, place a small waypoint shelter at the entry point. Drastically reduces the risk of losing progress to a long death-run back.
- Thirst before hunger, always — in every survival game and explicitly in Honeycomb's design, dehydration is faster and more severe.